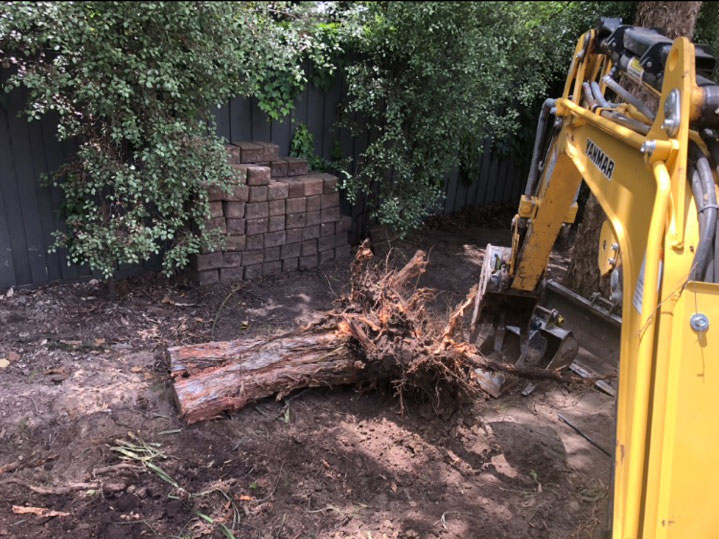
Small Tree Stump Removal
By detecting and eliminating trees that have grown hazardous or obstructive, tree removal services keep your property as well as the surrounding environment safe. There is no one better than our loppers when it comes to tree removals. Tree removal Melbourne professionals are trained, qualified, and equipped to provide a comprehensive variety of arborist services. Don’t bother wasting time or money on other tree removal services if you need immediate attention.
Our staff can not only remove the tree for you, but they can also assist you in identifying any hazardous trees that could be a danger to your house. We don’t feel that a task should come to an end with the removal of trees. Instead, we give comprehensive tree removal services that include tree stump removal, wood chipping, green waste disposal.
If the stump of a tree is left to decay in the ground and its root system continues to divert crucial water and nutrients away from your whole garden, it isn’t truly finished. Even after a tree has been cut down and all that is left is the stump, the root system of the tree may continue to grow and thrive.
Using a powerful machine known as a stump grinder, our teams can remove the tree stump for you after the tree removal to make sure the root system does not cause you problems down the road. With a rotating blade fitted with tungsten teeth, a stump grinder can break down the wood of the tree stump to below ground level. If you want a tree stump removal service included, let our crew know before they begin the job so that they can bring all of the necessary equipment and get it done as quickly as possible.
Tips on cutting a tree safely
Before you cut down an unwanted tree in your yard, learn how to do it correctly. Choosing the wrong saw, or attempting to cut down a tree without using the appropriate techniques and following safety measures, might result in serious injuries if you’re not careful.
- Decide if it’s Safe
As you chop, the branches will fall and they won’t likely stack themselves neatly into firewood. Check for any obstacles, such as power lines, buildings, electrical boxes, and dense vegetation while walking around the tree and your property. Calculate how far the tree will fall by taking measurements of both the near and distant areas. If any obstacle is in your way, you should skip to Step 10.
- Gather Equipment
The first thing on your to-do list should be safety equipment. Here’s what you’ll need:
- A hard hat
- Safety glasses
- Hearing protection
- Work gloves
- A chainsaw
- Felling wedges
Depending on where you reside, you may need a homeowner’s association or city permit, so double-check your local regulations and restrictions before using the chainsaw. For safety’s sake, get help from a friend who knows what they’re doing.
- Estimate the Fall
It’s difficult to assess the precise height of a tree and determine where it may fall. Examine the tree for uneven development, whether due to disease, overpopulation, or any other cause. It will certainly fall in that direction regardless of your efforts to redirect it if the tree is heavier on one side than the other.
For a more precise measurement, hold an axe at arm’s length and close one eye. Walk away from the tree until the top and bottom of the tree are parallel with the top and bottom of your axe. The top of the tree will come down roughly where you’re standing.
- Clear Escape Routes
Make certain you have a secure place to go if the job goes longer than expected. It’s better to have two backup options and ensure they’re free of debris. If something goes wrong, you’ll want a quick route to safety.
- Plan the Notch
The notch is what will allow the tree to fall properly, so you want it on the “fall side” so the tree will fall in the direction of the notch. The fall side should be the heaviest side of the tree. Make sure you can work without having to stoop. If the stump appears too large, remember that you may reduce the tree’s base later.
- Cut the Notch
Make the initial cut at a 45-degree angle downward after removing the top. Make a second, horizontal cut that is about 1/3 of the way into the tree’s trunk. The first and second cuts should meet up quite closely.
- Insert Wedges
Wedges are required for certain trees. If the diameter of the tree is more than 18 inches, wedges will aid in keeping your saw from being pinched. Any home improvement store may sell these. Begin the felling cut after the notch has been made (Step 8). Stop cutting as soon as you’ve reached enough to insert wedges, then pound in the wedges and finish the cut.
- Make the Felling Cut
Stop the cut and make a sidestep to the other side of the tree, out of harms’ way. The real purpose of this is to cause the tree to fall. Take care on your approach down through the notch; you’re moving away from it at an angle. Move toward the opposite side of the tree, as far away from it
- Remove Branches and Cut into Firewood
After the tree is felled, the next stage is known as “limbing.” What this implies: You take off the tree’s branches. The tree is then chopped into 16-inch pieces, known as “bucking.” To avoid making contact with the ground with your saw, make cut three-quarters of the way through, roll up. Then you may split those parts into logs and make bonfire marshmallows. However, be aware that there are regulations regarding the transportation of firewood.
- Get Expert Tree-Cutting Help
A tree that requires trimming or removal is usually enough to justify the use of an arborist. If you can’t assure safety, don’t have the necessary tools, or aren’t sure about your abilities, call a professional tree removal business.
Why remove the tree stump after cutting a tree
Tree stumps pose a number of problems for homeowners, including safety and liability concerns, unwanted tree growth, and insect infestation. These are just a few of the reasons why it’s critical to get rid of tree stumps from your yard. Tree stumps also create an unattractive yard appearance.
Children who play in the yard where a stump has been left are at risk of serious harm, and fast-running youngsters may not notice the stump. Visitors may trip over roots sprouting from the stump. Anyone walking about in the yard after dark is vulnerable to stumbling over the uneven surface. A backyard gathering might result in a visitor being injured when they trip over a stump that they didn’t notice. The surrounding soil can settle around the stump, creating depressions in the ground that may cause trip-and-fall injuries. It’s unpleasant to think about someone getting hurt at your party, and the liability concerns that come with it are never.
Another disadvantage is that cutting down a tree does not stop the stump from growing. The roots will continue to develop as a result of this fresh growth, causing damage to the yard, cement, or sewer systems in some cases. The new development will also deplete nutrients from the earth, causing the lawn or other surrounding plants to wither. The grass is the most susceptible plant life to these impacted by this continuing growth. Because of a lack of water, the grass will eventually die, and any attempts to water it will simply feed more water to the newborn stems from the stump.
ABC technique and tools on removing a tree stump
When it comes to removing a tree stump, the first step is to cut away the roots. The general rule of thumb is that roots extend as far under the ground as branches above it. We’ll walk you through the procedure of how to cut them. We also teach you what tools to use and provide a few more hints to make the task easier.
Tools to use
- Axe
- Crowbar
- Mattock
- Pruning saw
- Rake
- Shovel
Dig around the tree’s base. Use a mattock to loosen the dirt, working in a circle around the stump’s base. Dig further out from the stump’s base – you’ll just be digging roots if you don’t. Remove the soil from around the root system with your shovel after it has been loosened.
Remove the soil from around the larger roots before you chop to make the cutting simpler. After that, use a pruning saw to cut through the medium-sized roots. Then, using your axe, chop through the bigger roots.
Remove the tree stump and cut the lower roots. Dig beneath the stump after removing the top root system. You can begin to utilise the stump as a lever by pulling it away from the dirt to expose the lower roots. Cut the lower roots after you can identify them. After that, use your pruning saw and axe to chop them down. Then simply remove your stump from the ground and replace the soil in its place.